
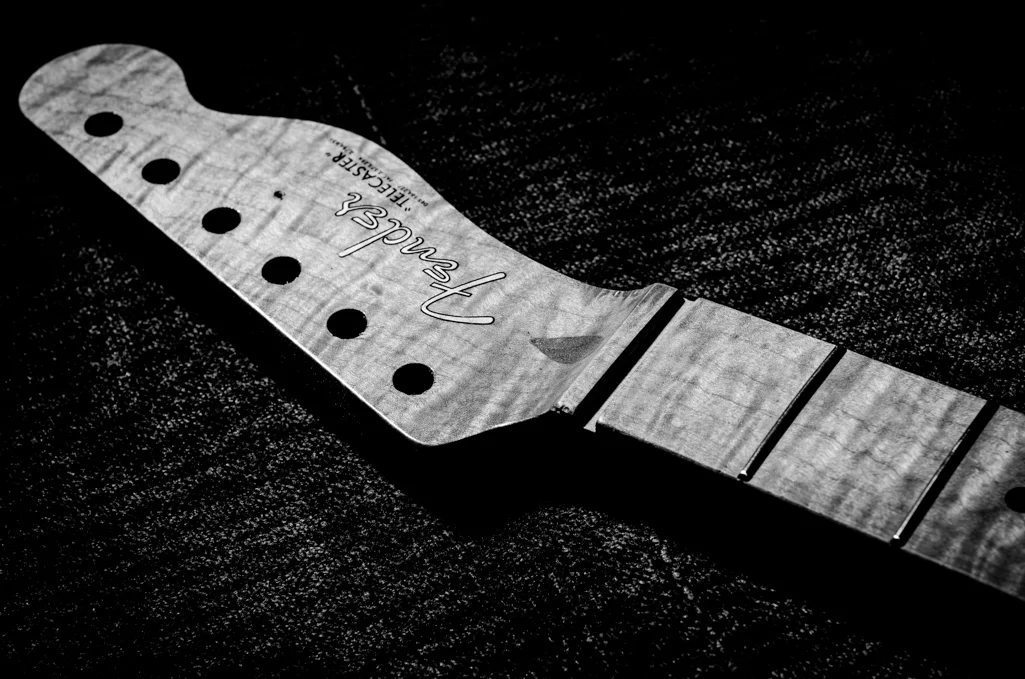
Cheap flame maple knock-off Tele neck found online.
A customer brought in a replica flame maple Tele neck that he found online for ridiculously cheap. The flame in the maple was incredible, however someone had modified the nut slot. The nut slot was widened to 1/4" for some reason. Maybe someone thought a larger nut would improve tone or something? Who knows. A bigger nut is not really a problem though. This is a knock-off replica neck, so there is no real "Fender" value to ruin with funky modifications. The problem is that the slot was widened towards the bridge instead of adding width back towards the headstock. The leading edge of the nut where the strings break, along with every fret and bridge saddle location, is very critical to a guitar playing in tune. This nut slot modification pushed the nut 1/8" closer to the bridge and makes intonating the guitar impossible. Since this neck has a beautiful flame pattern to it, the player decided to put some money into it and have it corrected.
The plan breaks down into two parts: fix the neck and setup.
Part one:
1. Flatten and square the existing nut slot
2. Fill in the nut slot with a piece of maple
3. Recut an 1/8" nut slot in the correct location
4. Make a new bone nut
Part two:
5. Transfer tuners and string tree from the stock Tele neck over to the new flame maple neck
6. Remove the stock neck from the body and install the new neck
7. Level, crown, and polish the existing frets to account for an uneven fingerboard surface
8. Intonate and setup
: : : : : :
Part one: Fix that sloppy nut slot.
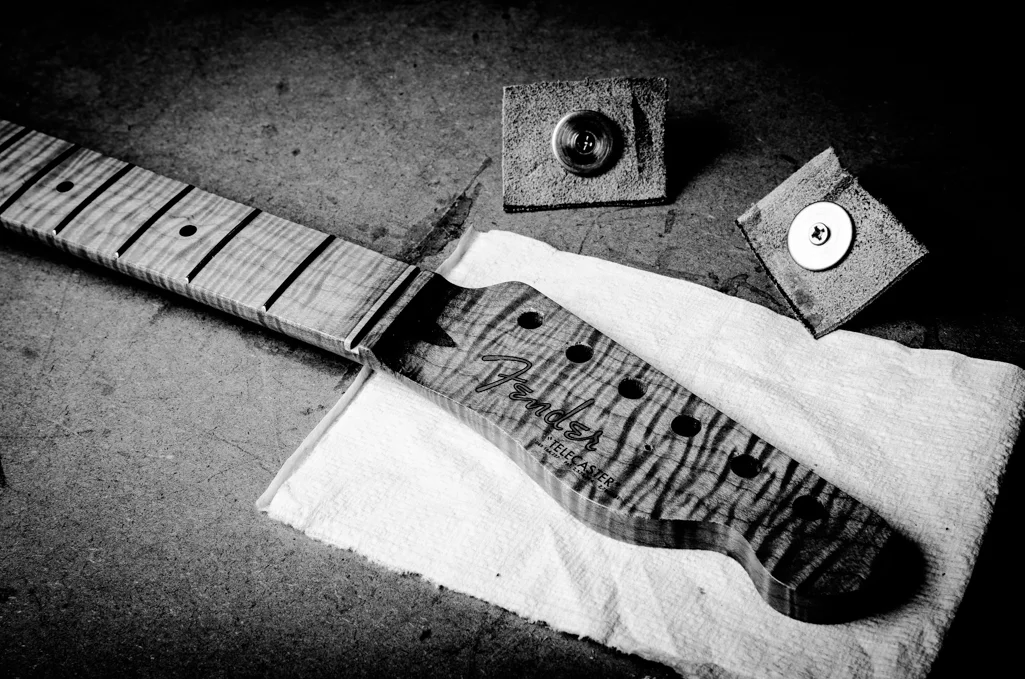
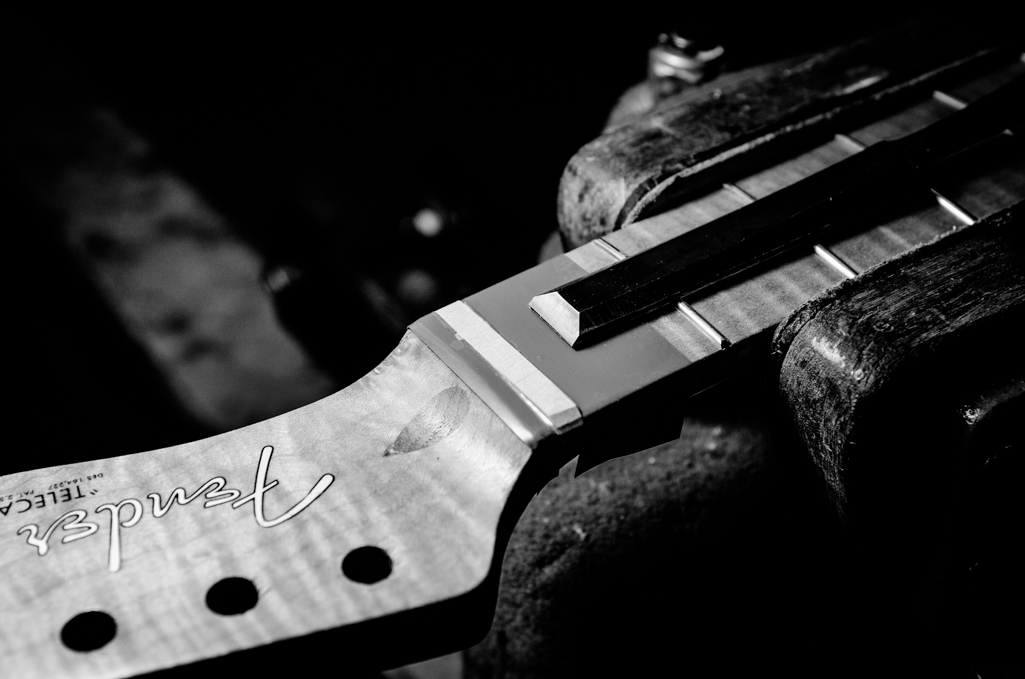
Improperly widened nut slot (not that there is really a need to widen a nut slot).
Headstock secured to work board.

Saddle slotting jig used to rout the existing oversized nut slot clean.

Another view of the nut slot routing setup.

Multiple passes are made at varying depths until the slot is flat and square on one edge (left side in the above photo). Then the guides are bumped to clean the other edge (right side). I use a 1/4″ diameter router bit, but needed to cut oversize to take a little off of both edges of the slot.

A feeler gauge offsets the axillary fence enough for the undersized router bit to cut the remaining edge of the nut slot. Once the auxiliary fence is set (right side as seen above), the main guides can be repositioned to butt up against it and another pass is made with the router.
The nut slot is now flat and square and ready to be plugged.

A maple plug is cut and fit to the oversized nut slot. The edges of the slot are masked with tape to ease in cleaning the glue squeeze-out.

The maple plug is glued and clamped.
The maple fill is trimmed down and prepped for a new, properly located nut slot.

Repeating the routing process as before but cutting a new 1/8″ wide nut slot in the proper location.

1/8″ nut slot cut in the proper location to allow the neck to play in tune.

The new nut slot is complete. The routing setup is removed, along with the screws holding the neck down to the work board. A new bone nut is now ready to be fit.
Part two: Switcheroo the neck and setup.

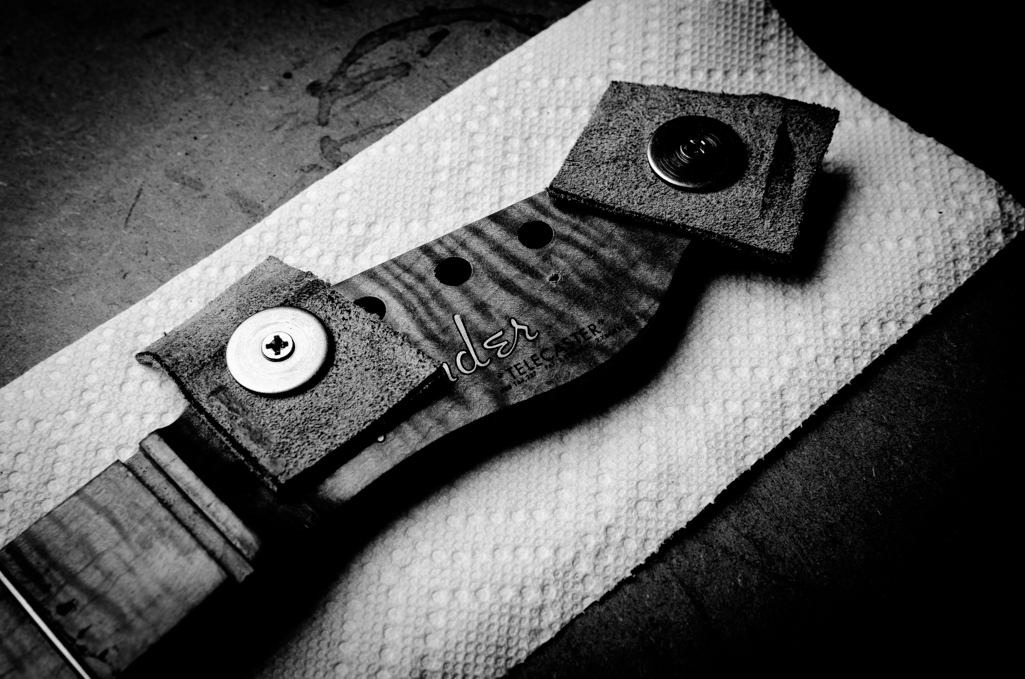
The new flame maple neck is ready to be swapped with the original neck on this Fender relic Tele. Note that a new bone nut has been fit to the new neck.

Rear view of the new flame maple neck and the stock Tele neck.
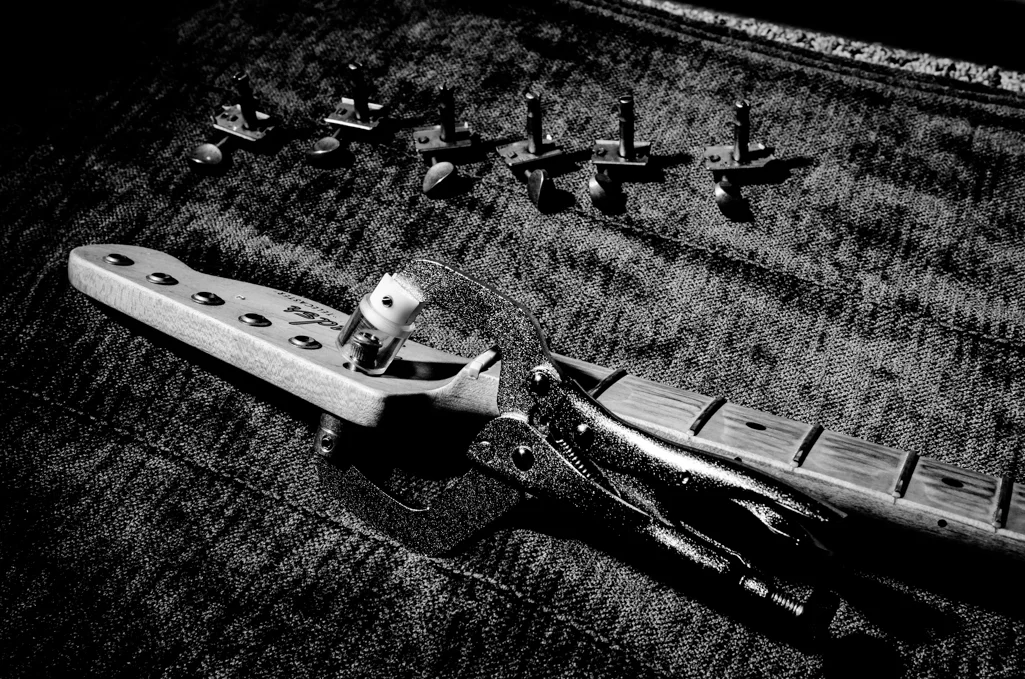
The tuning machines are removed and the bushings pressed out of the stock neck. This Stewmac tool is great for removing stubborn bushings safely.

The stock tuning machines and bushings are ready to be installed in the new neck. Note that the string tree has been transferred as well.

Rear view – the stock vintage-style tuners installed in the new neck.

The new neck installed on the body and strung up to pitch. Even with the truss rod turned completely slack, the neck was backbowed when not under tension. Stringing up the guitar allowed me to assess how much the strings would pull the neck up. This one-piece maple neck was very flexible and did straighten out quite a bit under tension.

Another view assessing the neck’s geometry under load. The frets were very uneven as the fingerboard surface was not properly leveled. Ideally the frets should have been pulled and the fingerboard sanded true, refretted and then refinished, but this was a budget project to make an inexpensive “pretty” neck playable. There is enough fret height to allow the frets to be ground true.

The strings and nut are removed and the fingerboard is taped up between the frets. This will protect the maple during the leveling, crowning and polishing of the frets.

Metallic fret dust covers the fingerboard from leveling. Note that the middle of the neck and the last few frets received the heaviest leveling, as seen from the filings left on the fingerboard masking tape. This neck required extensive leveling as the fingerboard surface was not properly leveled. A glass block with 220 grit is my weapon of choice on this neck to address these high spots.

Here is a close up of the heavy leveling required in the middle of the neck. Luckily the frets had enough height for this moderate removal of material.

Another view of the heavy fret material removal in the middle of the neck. Note that there is not much fret dust down towards the nut.
And after much leveling of this "roller coaster" fingerboard, the frets were ready for crowning and polishing, leaving the guitar ready for intonation and setup. The neck came out great, other than being a little on the floppy side. I have definitely have had much stiffer necks come across my bench. Thankfully the neck pulled up enough for me to be able to tighten the one-way truss rod. This will allow for adjustments to be made both ways should the neck move in the future.
The player loves the feel of this new neck and the flame maple really stands out. I do not think another one of these jobs will come across my bench again anytime soon, but these projects sure are fun! This was certainly an odd modification to a nut slot.

The fretwork and setup are complete. The new bone nut is fit, cut and polished as well. The neck pulled up enough to require the truss rod to be tightened. Very good!

Player’s view – what a killer piece of maple! Makes all of this work worth the effort to rescue this piece of wood from a nut slot mishap.