
1967 Gibson ES 175-D in for new frets.
Here is a quick little trick that may save you fellow repair folk and players from some unneeded anguish. A 1967 Gibson ES 175-D will be used for this example. This guitar is in for new frets and a general setup.
The fretjob will require:
1. remove the strings
2. remove the old frets
3. plane (sand) the board
4. install new frets
5. level, crown, bevel, dress and polish the new frets
6. install new strings and setup
I use the hammer method to install frets. This is a tried-and-true method that works great for a lot of builders / repair people. There is one issue with the hammer method that you may never think about: loose tuner bushing in the headstock.
This guitar was rather obvious that it had loose bushings as the tuner posts moved around quite a bit. You could even remove some of the bushings with your fingers. These should be a snug, press fit. I learned the hard way that once the strings are untied from the tuners, there is nothing preventing loose bushing from falling out a Gibson peghead. This also applies to most vintage-style tuners, including Martin, Guild, etc.
So back to the hammer discussion. When you strike the fret, you impart a force that vibrates the guitar. This impact can translate up to the peghead and vibrate those loose bushing out. If you have ever lost a small item on a shop floor, you know how frustrating it is to find and how you just hate yourself for letting it happen. Your time is better spent up on your feet rather than on your hands and knees.
I am guilty of this more than I would like to admit.
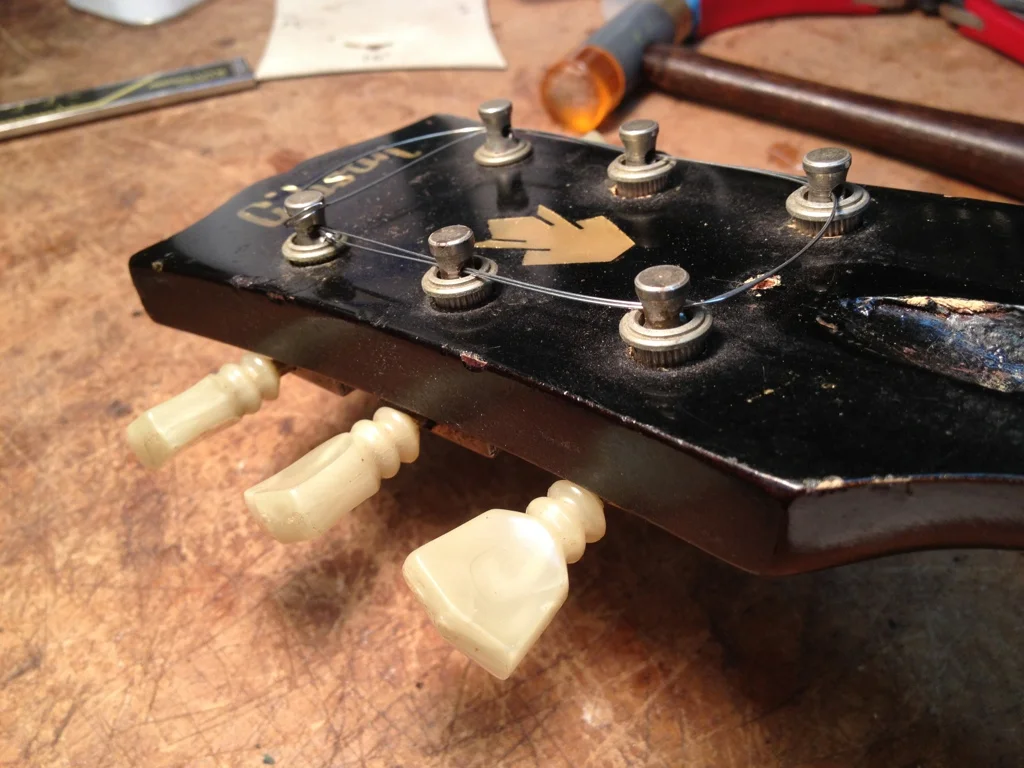
So here is a good way to hold onto your bushings while the strings are removed ...

A guitar string is used to prevent the loose tuner bushings from disappearing on the shop floor.
... reuse one of the old strings to loop around and cap off each tuner post. You can see how just by knocking in the frets that some of the bushings have risen up and are stopped by the string. Without tying off the posts, consider those bushings gone. Also loose bushings may look flush, it doesn't take much for them to come loose since they are a tapered fit. While handling the guitar, for example, they may just decide to drop out on you on your way to the buffer.
This stupid little trick will save your ass, especially on a vintage guitar. You don't want to be scouring eBay for one period-correct bushing and pay the ridiculous prices people are asking. Really it's about saving time as well. Time looking for the damn thing. Then time to call around or search the internet for a replacement. All can be prevented in less than 30 seconds by just saving one of the old strings and tying a quick loop.
I refitted the loose bushings by removing them and applying medium super glue to the bushing knurls. Then I spray them with accelerator to cure the glue. Once cured, I file away the added material until they press into the peghead with a nice snug fit.
Below you can see the finished guitar. I love these old 175's.
You can see why I make my living working on guitars rather than playing them.